Introducing Jetpack Compose into an existing project.
Integrating a new tool in a production product

- Part 1 — Integrating a new tool in a production product.
- Part 2 — Designing your first composable.
- Part 3 — Creating a custom button with Jetpack Compose.
- Part 4 — Creating an expandable view with state using “remember”.
In this series of articles, I will describe how we at Lemonade have introduced Jetpack Compose into our codebase, intending to utilize it more and more as we grow our product and move towards a finer, more polished product.
It's a stable time.
Since the stable release of Jetpack Compose’s stable version, we are witnessing its growing popularity in the developer community, and now is the perfect time to introduce it into your code.
The first thing we need to get straight is that introducing a new UI tool kit, as dawning as it sounds, is not as deterministic as one might think.
You definitely don’t need to convert all your old XML views into Compose components written in Kotlin, you don’t even have to rewrite your java code to Kotlin.
The best, and most recommended way to go about introducing Compose into your code is to start small, here is how we did it at Lemonade.
Find the right candidate.
In one of our upcoming features, we had the requirement to build a simple screen. It contained a list of expandable items, each with a radio button, a NEXT button, and a SKIP button.

Looking at the design it seems like the perfect candidate for Jetpack Compose, for the following reasons:
- It is isolated, receives data, and returns a result, without side effects or asynchronous operations.
- It contains a recyclable list, and an animated feature in it (expandable items)
- It contains a customized core component of the Android system — the Radio Button.
Convince the team.
The best advice I can give any developer pushing to introduce this new UI tool kit into their code is to find a screen or component that, by using Jetpack Compose over the view system, can create value for the project managers (Save some time of development) and product teams (achieve higher quality animations and UX).
It should be small enough to be isolated and quick but big enough to improve TTE (Time to execute).
Getting started.
The first thing we need is support for Jetpack Compose in our IDE, which means we need to work with android studio 2020.3.1 (Arctic fox and above), make sure your project complies with this IDE and nothing breaks, there should not be any major issues at this point as Arctic Fox is also stable at the time of this writings.
If you haven't so far, I highly recommend the developer documentation for Jetpack Compose, containing code labs. Pathways, and samples.
Configure versioning.
To add Jetpack compose to your project we need to add some configurations to our build.gradle.
android {
   ...   kotlinOptions {
      jvmTarget = '1.8'
      useIR = true
   }   buildFeatures {
      compose true
   }   composeOptions {
      kotlinCompilerExtensionVersion compose_version
      kotlinCompilerVersion kotlin_version
   }
}
This should go in your main build.gradle file, if your project is a multi-module project, and you have multiple Gradle files, you would want to put this in your main or common module, and basically, the module in which you would want to use your compose code.
Later articles might discuss some multi-module project architectural decisions regarding Jetpack Compose’s placement in the codebase.
Let’s break that down.
kotlinOptions {
   jvmTarget = '1.8'
   useIR = true
}
In the section above set the java version to be 1.8, which is the minimum required by Jetpack Compose.
We also set useIR to true. IR stands for internal representation (IR) of Kotlin code. This means we will support the new backend for Kotlin representation and its main use can be to enable future support for KMM (Kotlin Multiplatform Mobile).
buildFeatures {
      compose true
   }composeOptions {
      kotlinCompilerExtensionVersion compose_version
      kotlinCompilerVersion kotlin_version
   }
While the buildFeatures is somewhat self-explanatory, the composeOptions part is the one we need to pay attention to.
Notice we use compose_version and kotlin_version.
Versioning
If you haven't so far, it is a good practice to store all dependencies version numbers in a single location on the project level Gradle file:

This can be achieved easily like so:
buildscript {
    ext {
        compose_version = '1.0.1'
        kotlin_version = '1.5.21'
}
Then we can use these variables in other Gradle files when configuring our dependencies.
As of these writings, Jetpack Compose’s latest version is, and its compatible Kotlin version is 1.5.21.
Upgrading to these versions should not cause any issues, configure your versions, build, and make sure everything works as intended.
Gradle version.
While the AGP (Android Gradle Plugin) is at version 7.0.0 right now, you should build your project and see that everything works well with this version, if your project is using other dependencies that rely on the Gradle plugin, you might encounter compilation and build issues.
While the correct path is to solve these issues by upgrading the rest of the dependencies, this might lead you down a rabbit hole that can be dealt with at a later time, and you should know that you can configure Jetpack Compose with lower versions, as low as 4.2.2 as of this writing.
The Gradle plugin version is set in the same Gradle file where you declared your versions, the project level Gradle, like this.
dependencies {
    classpath 'com.android.tools.build:gradle:4.2.2'
}
Last but not least
All that is left is to import Jetpack Compose’s dependencies to your main module Gradle file:
dependencies {
 …// Compose
    implementation   "androidx.compose.runtime:runtime:$compose_version"
    implementation "androidx.compose.ui:ui:$compose_version"
    implementation "androidx.compose.foundation:foundation:$compose_version"
    implementation "androidx.compose.foundation:foundation-layout:$compose_version"
    implementation "androidx.compose.material:material:$compose_version"
    implementation "androidx.compose.runtime:runtime-livedata:$compose_version"
    implementation "androidx.compose.ui:ui-tooling:$compose_version"
    implementation "com.google.android.material:compose-theme-adapter:$compose_version"}
There are several dependencies here and it's a good idea to get to know each one and its role, you can find more information on the developer documentation.
Warning: Watch out for transitive dependencies required by Compose as that could bump some of the dependencies used in your app. For example, using the
activity-composedependency requiresandroidx.activityto be in version 1.3.0 as well.
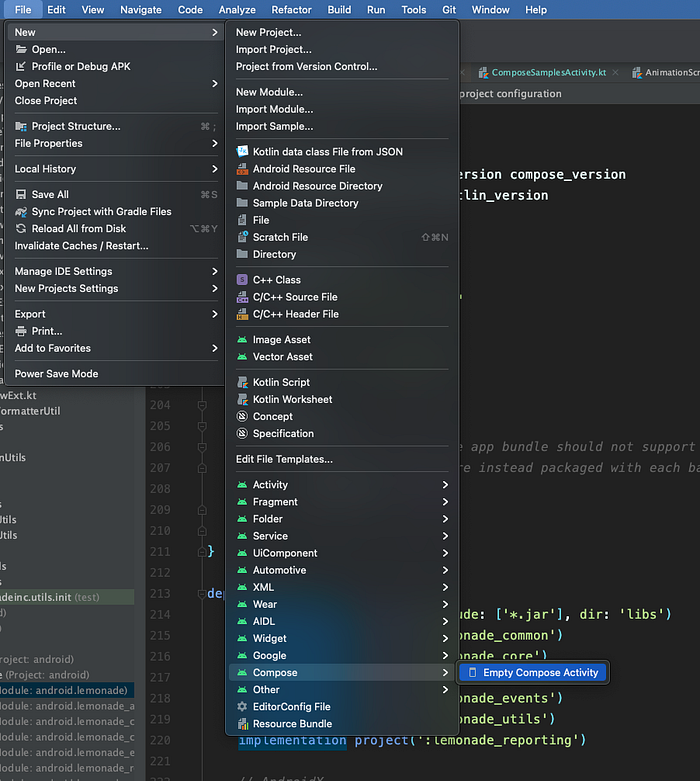
That's it! you can now start a new Compose activity straight from the new menu in your Android Studio
And lastly, here is the build.gradle file we configured and a gist for better viewing.
Have fun composing! don't forget to clap and follow!
But only if you think I deserve it 😉